Please note: Software of this page remains your original file un-touched.
- There is no risk to them. Please do not select one of your original file names as the name for the target.
- If you do, still software leaves it safe, adds some prefix such as "_Zx" to its tail before extension ".pdf" to keep the original file unharmed.
- Software of this page has no limitation on the number of files and size of the files.
- Please allow them enough of time if your files are large, in particular for high resolution PDF files.
Merge Tab : (please click) Merge Tab.
Feature Tab : (please click) Feature Tab.
Split Tab : (please click) Split Tab.
Water mark Tab : (please click) Text Water mark Pane.
Water mark Tab : (please click) Image Water mark Pane.
Water mark Tab : (please click) Image Water mark Pane: using a batch file to locate watermark images.
Water mark Tab : (please click) Further Features Pane.
Download the software from the download (click) page.
As it is customary in modern software, the title bar disappears. On moving the mouse to the top of GUI, it appears again.

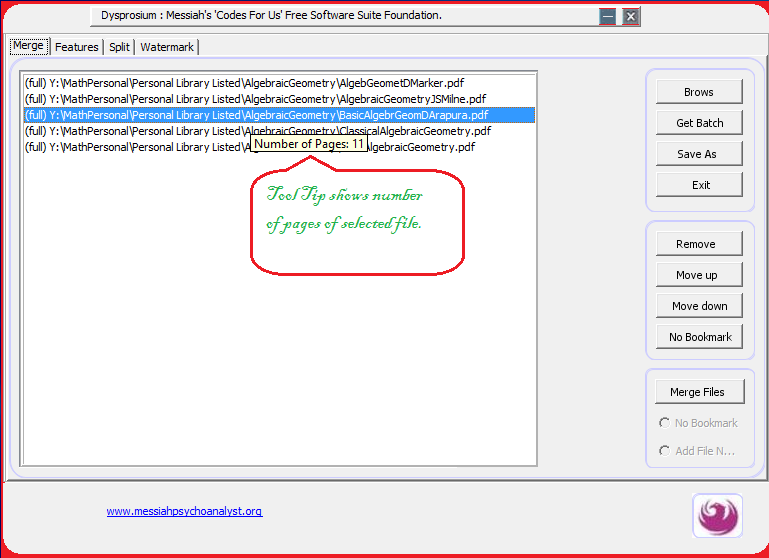
Use Brows button to go to the directory you have kept your PDF documents to be merged.
Brows again and again if you have some files in other directories that should be participated.
You might like to drag and drop files in the list area, instead of browsing.
If you are using drag and drop then become sure that you will use also the "Save As" button for the selection of a name for the resulting merged file. This is necessary for operating system to sense the drag and drop is validated.
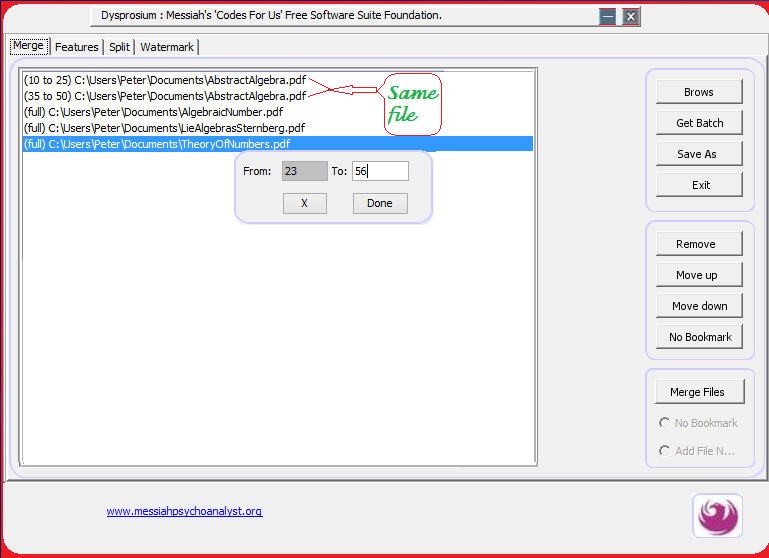
Sometimes you need to merge only part of a documents to be merged with other items. In such cases, select any file, by clicking on that file. Right Click on the selected file to enter pages of the file you need to be participated in the merge.
If you need other parts of the same file, too, then you have to drag and drop that file again, as many times as you need.
It is interesting that if you remove all files and only keep one. Then select certain desired pages of the remained document and click on "Merge Files." Those selected pages will be split from the document as a separate document. Your original file remains untouched. For more split options use Split tab.
Remove those files you do not like to participate, using the "Remove" button
Rearrange your files according to your desired sorting order for merging files, using "Move up" and "Move down" buttons.
If you need to remove bookmark from certain participating files click on those files one by one and then click on "No Bookmark" button
Use "Save as" button to choose a name and a directory for your resulting merged files.
If you forget to use "Save As" button, then your merged file will be named as "Your_Merged_File" file and will be sent to the last directory that you have opened for participating files.
If you like to remove bookmark from all participating files, then click on "No Bookmark" radio button
If you like to add file name of participating files as a bookmark to your resulting file, then click on "Add File Name" radio button.
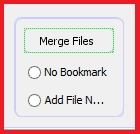
Click on "Merge Files" to begin merging operation.
Additionally, you can use a text file as compilation of paths to your PDF documents and instead of "Brows" use the "Get Batch" button.
Please read the following "How To" to learn about it.
- How to use Dysprosium File Listing Tool (needed for Water-mark Image Batch and for the Get Batch).
Software is busy
If you have participated large files, say, near to 1000MB (1GB) then it may take several minutes to finish the job.
In such cases you should have proportionate Java Run Time memory.
Java Run Time memory is a temporary usage of your RAMs during running any Java application such as this.
If you receive any message from Java Run Time regarding "Not enough memory" or "java memory heap", such things, then you need to Increase your Java memory as described in this wikiHow : How to Increase Java Memory in Windows
Job's done.
To enable any function, First you need brows and select your target file
There is no need to select any name for the altered file. Software put the altered file next to your original with a _Zx added to its name.
_Zx for "Resize" becomes ZS, _Zx for "Re Zoom" becomes _Zoom, _Zx for "Rotate" becomes _ZR, _Zx for "Page Number/header/footer" becomes _Zp.
Alternatively, you can use "Save As" button to choose your desired file names.
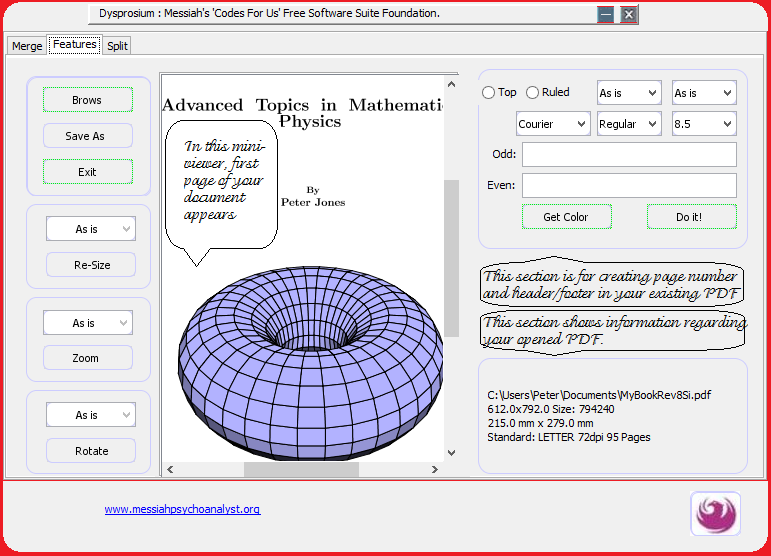
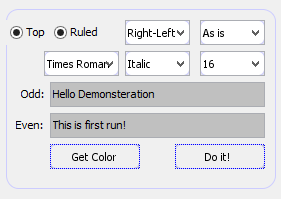
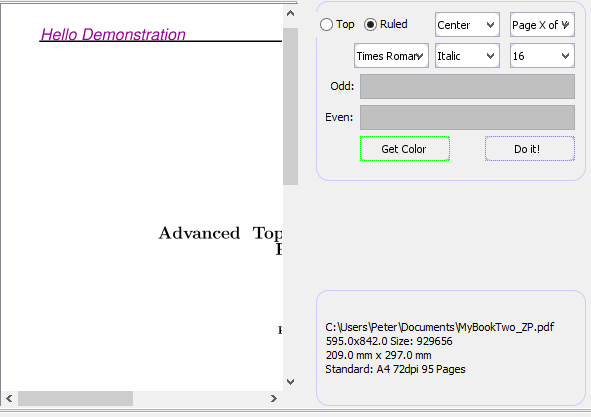
You might like to use page numbering section to add page numbering at the top (by clicking on "Top" radio button) or bottom (by leaving the "Top" radio button un-clicked) for an existing PDF.
You can put a line at the top (by clicking on both of "Top" and "Ruled" radio buttons) or bottom (by leaving the "Top" radio button un-clicked and "Ruled" radio button clicked) for your existing PDF file

Select position of added text as "centre," or "right on odd pages left on even pages" and so on from the first (position) drop down menu.
Select one of the software formats from the second (format) drop-down menu as "Page x of total y" pages etc. Selecting one of these disables the custom "Odd" - "Even" text fields.
Select font family, font style and font size and colour of your page number/header/footer.
If you leave the format drop-down menu "As is" then you can use custom header/footer at the selected positions (centre, right-left, etc.) of each odd and even page.
Type in the "Odd" and "Even" text fields after filling each field click on return (enter)  button.
After finishing the job, click on "Do it!" button.
Run the software twice or more if you choose to have both custom header/footer and pre-defined page numbering. In this case you do not need to close the software and open it. Just brows to the result of previous operation and do a new job on it.
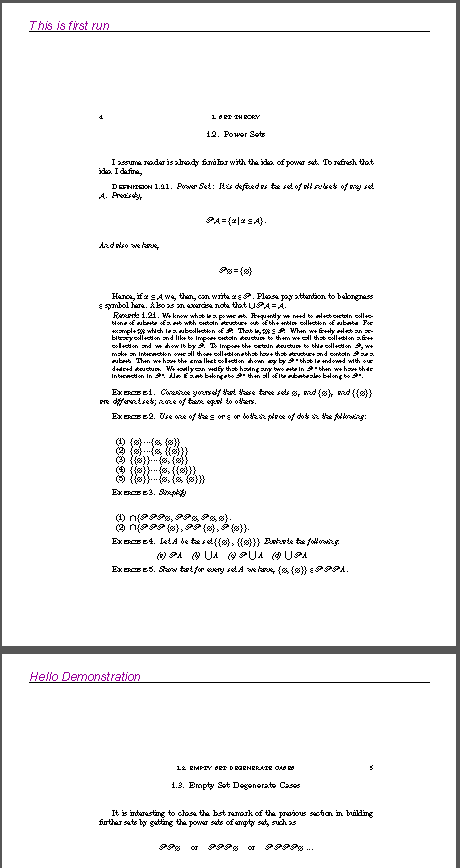
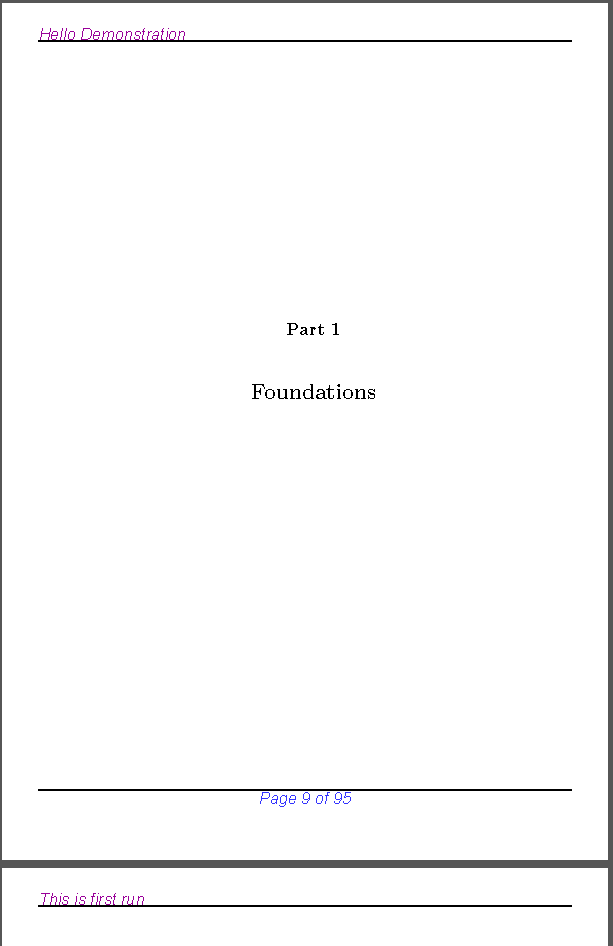
Please have a look at some results.
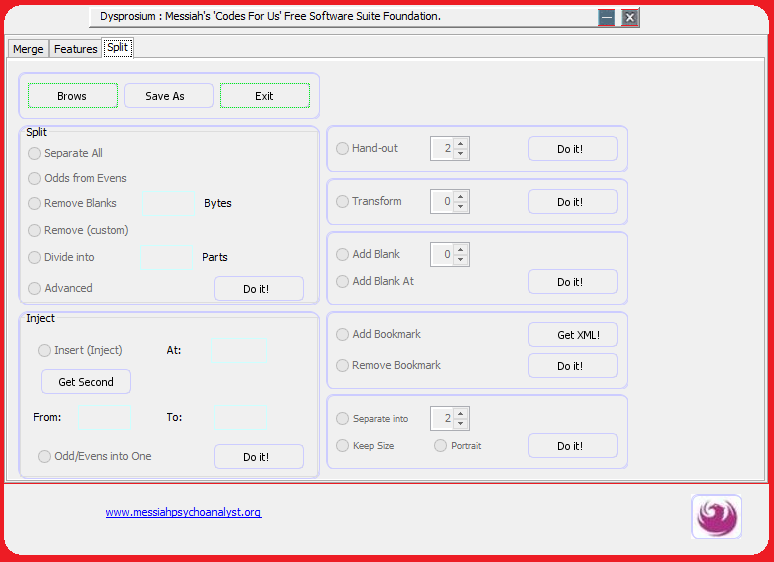
- For Split tab, please first "Brows" to where you have kept your target document.
- You can use "Save As" button to select the desired name and directory of the result. There is an automatic built-in naming mechanism that prevents any duplicate name or overwriting the existing files; also if you forget to use the "Save As" facility.
- Only after browsing the software becomes enabled.
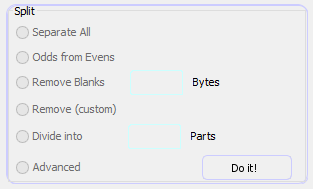
- First option allows splitting all pages of your document into single page documents.
- Second option separates odds pages from even pages and put them in two separate document.
- Using third options allows you to remove blank pages from your file. You need to decide what do you mean by a blank page by entering your desired value into the text field in terms of bytes. A blank blank page is less than 50 bytes.
- By selecting "Remove (custom)" you'll be able to separate a portion of a document from remaining. To do that you need to enter "From" page to "To" page in the opened dialog. After entering those values, click "Done" to be able to continue. Button labelled as "X" dismisses the dialog without saving any value. Entering non-integers or a value greater than number of pages of your document make the text fields red to revise your entered values.
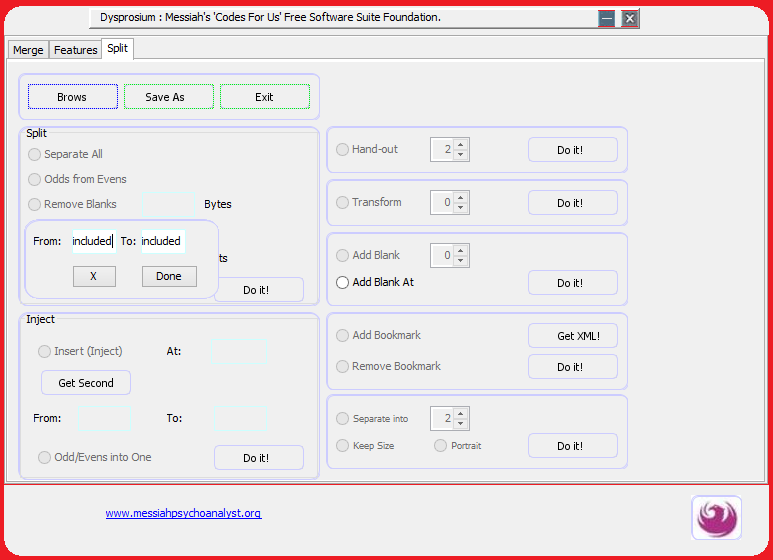
- Next you are able to divide a file into equal parts. For example, you can divide a 100 pages document into 5 parts each 20 pages. If you divide a 100 page document into, say, 7 parts, the last part will come as 16 pages; 100 =6 x 14 + 16.
- Advanced split separates your desired portions from the original in the opened dialog, enter "From" and "To" pages and click "Next" and enter the next portion. When finished click on "Done" to save. If you click on "X", dialog gets dismissed without saving anything.
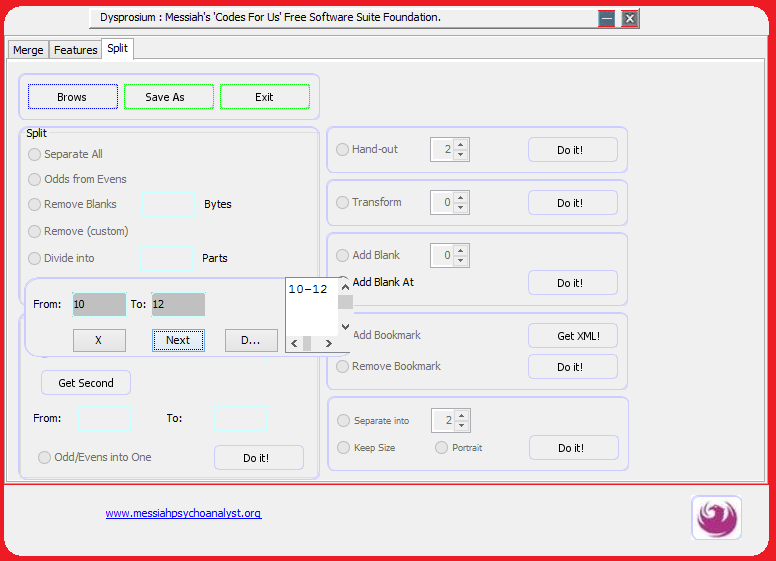
- After selecting and completing any of above options please click on "Do It!" button to finish the Job.

- Use "inject (insert)" options to put part or all of another file inserted at a certain page of your document.
- In first inset option, decide for the page that you like to inject your file.
- Then brows to your second file using "Get Second" button. After that, enter the pages you intend from the second file to be inserted.
- Click on "Do It!" button to finish the job.
- Yet choosing "Odd/Even into One" option allows to interlace all pages from two files. It is not necessary to have the same number of pages in both files.
- To do that, click on this option. Get the other file by browsing to it using "Get Second" button.
- Click on "Do It!" Job is done now.

- Use "Hand-out" options to create and print college hand-out from your document.
- You can have 2 pages in one page or 4 pages, 6 pages, 8 pages, or 10 pages in one page hand-out by using the "Spinner."
- Then click on "Do It!" button.

- If you have scanned pages came as tilted in this way or that way , you might like to correct them using an affine transform of PDF.
- Decide for the tilting angle, clockwise (negative) or counter-clockwise (positive). Function of software is limited by the defined PDF box of document. Therefore, you have to test how far you can tilt your document.
- Then click on "Do It!" button.

- Use "Add Blank" options to add one or more (depending on the "Spinner") at the end of your PDF file.
- You can add blank pages at the desired points inside your documents, by clicking on "Add Blank At" option.
- A dialog opens asks you at which pages it should add. Fill the text field and click on next until done. Then click on "Done" to save your entered values. Clicking on "X" button dismisses the dialog without saving anything.
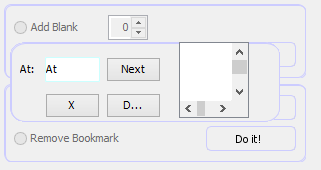
- Then click on "Do It!" button.
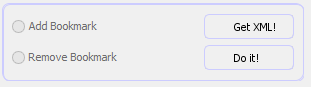
- If you have a bookmark file prepared as an XML for your file, you might like to use "Add Bookmark" option to add it to your existing PDF file.
- You need to "Get XML" by browsing to its directory.
- Then click on "Do It!" button.
- Conversely you can remove the bookmarks from an existing PDF document. It automatically will be saved as an XML file. The non-bookmarked PDF document will be saved with a new name to keep the original untouched.

- If you have a book that compiled as double or quadruple face to face hand out or scan of double pages or for any other reasons, then this feature can convert it to one pages
- Select your options.
- Portrait option is for when your double pages are at the top of each other instead of face to face.
- Then click on "Do It!" button.
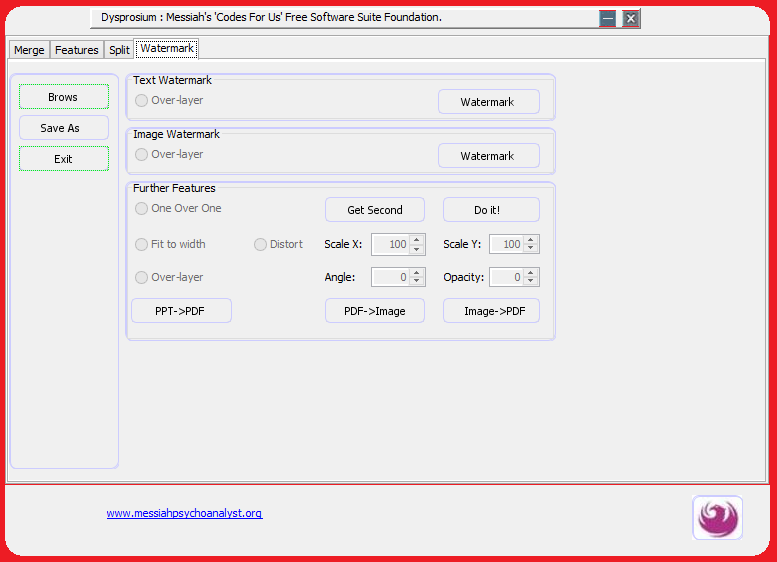
To enable any function, First you need brows and select your target file.
There is no need to select any name for the altered file. Software put the altered file next to your original with a _Zx added to its name.
_Zx for "text water mark" becomes ZWt, _Zx for "image watermark" becomes _ZWi, _Zx for "Layer (One Over One in Extras)" becomes _ZL.
If you like you can use "Save As" button to choose your desired saving name.
Some PDF documents are opaque on creating them. These include PDF files created by Google docs, probably Open Office, conversions by commercial on-line converters, and so on. For this type of documents an under-layer book mark will appear invisible. Such an invisible book mark is usable for hiding web addresses or any other usages.
If you like your water marks to be visible, then do not forget to click on "Over-layer" button for such opaque documents. Default of the software is under-layer. You can adjust the transparency of the water marking text in the next dialog after clicking on the "Watermark" button.
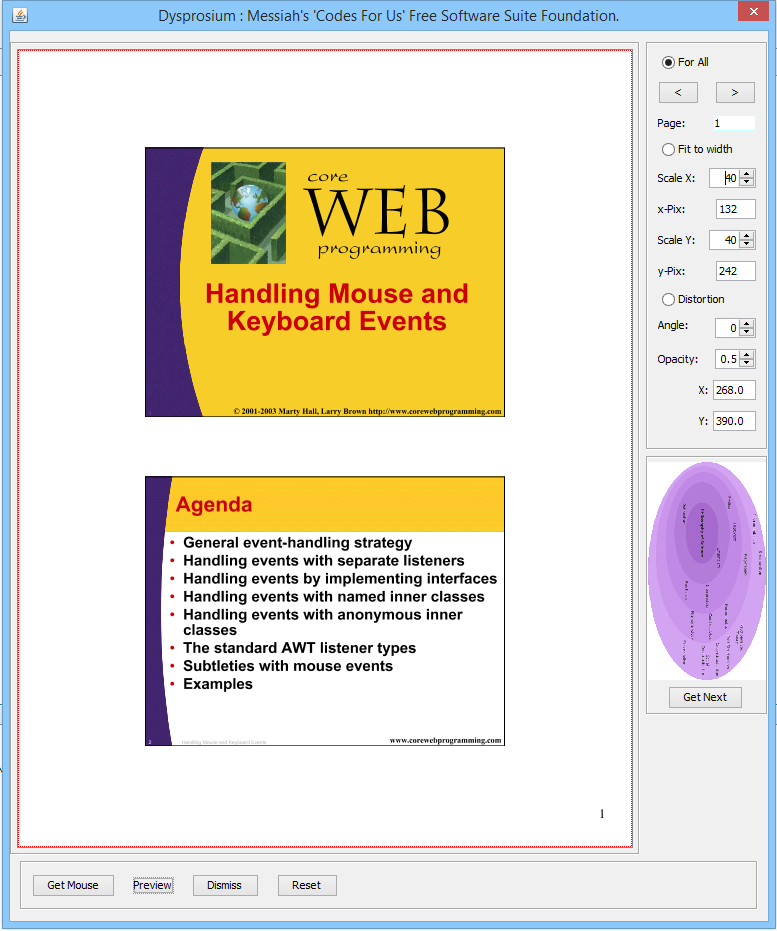
Click on "Water mark" button to bring "watermark dialog" on. A preview of your original file could be seen.

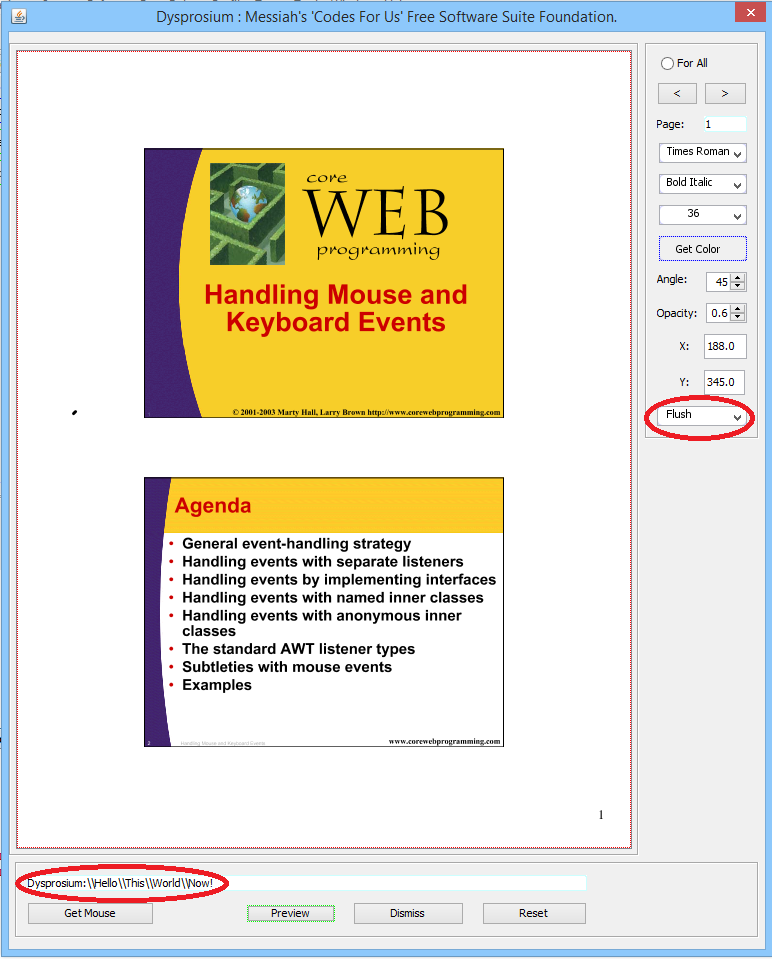
On the dialog, decide if you like one and the same text for all pages by clicking on "For All" button. Otherwise you can create different water mark schemes on different pages.
If you are deciding that put the same or different water mark(s) on certain pages then you need to configure each page separately by clicking on ">"
Only after filling the "Text Field" with the water mark text and pressing the "Return" (↲) key on the keyboard of your computer you can activate mouse "Get Mouse" button on the desired page of your file.
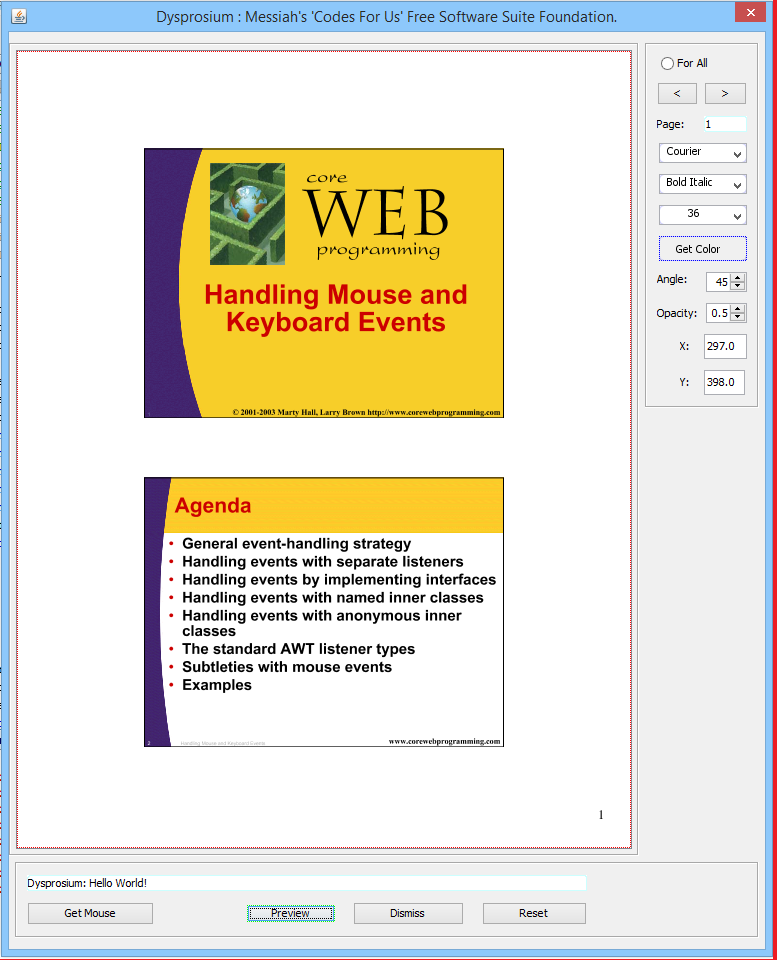
If you put the Opacity equal to zero (default is 0.50), your text comes as invisible.
You need to double-click on the point where you like to put your text as water mark. Then mouse jumps by itself on "Preview" button.
Click on the preview button to accept the job or dismiss and revise your work.
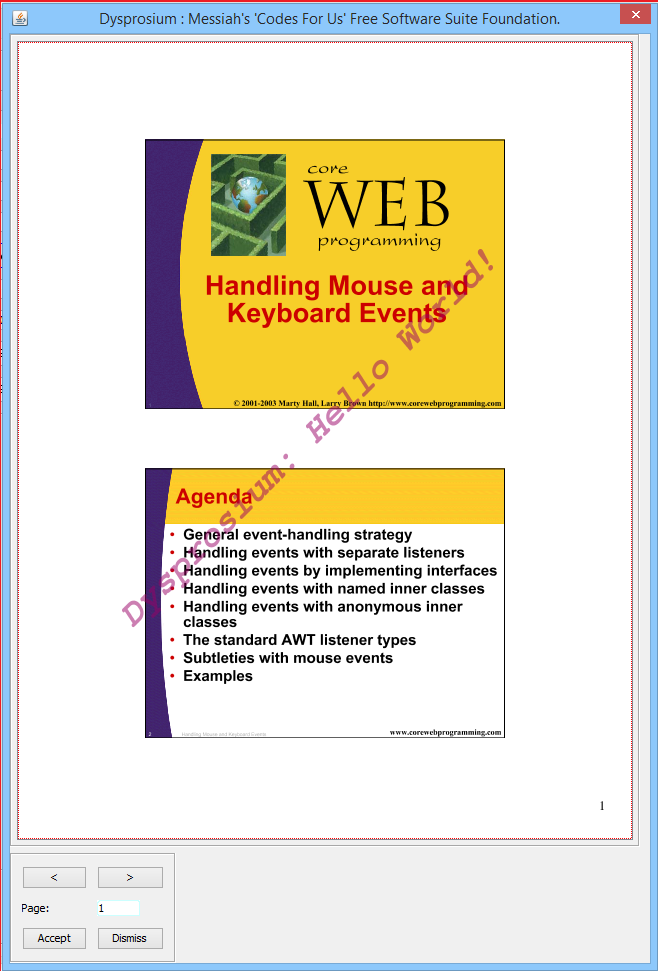
You can have your watermark text in more than one line. In such a case, enter \\ at the end of each preceding line. For example, Dysprosium :\\Hello\\This\\World!
To enable any function, First you need brows and select your target file.
There is no need to select any name for the altered file. Software put the altered file next to your original with a _Zx added to its name.
_Zx for "text water mark" becomes ZWt, _Zx for "image watermark" becomes _ZWi, _Zx for "Layer (One Over One in Extras)" becomes _ZL.
If you like you can use "Save As" button to choose your desired saving name.
After opening the image water mark tool, please click on "Get Next" button to brows to and get your watermark image.
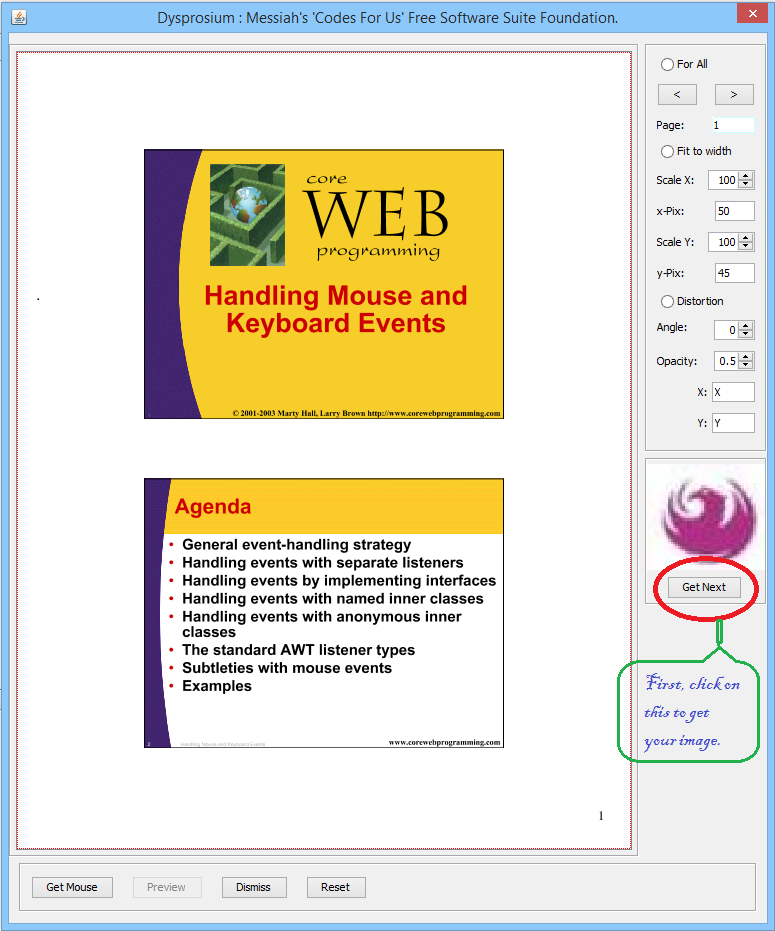
Adjust parameters of image as you need such as scale, angle, opacity, etc. If you put the "Opacity" equal to zero (default is 0.50), your image comes as invisible.
Click on "Get Mouse" button and select the point that you like your image to be appear. That point will put the bottom left your image. You need to double click on that point to confirm it. Then click on preview button.
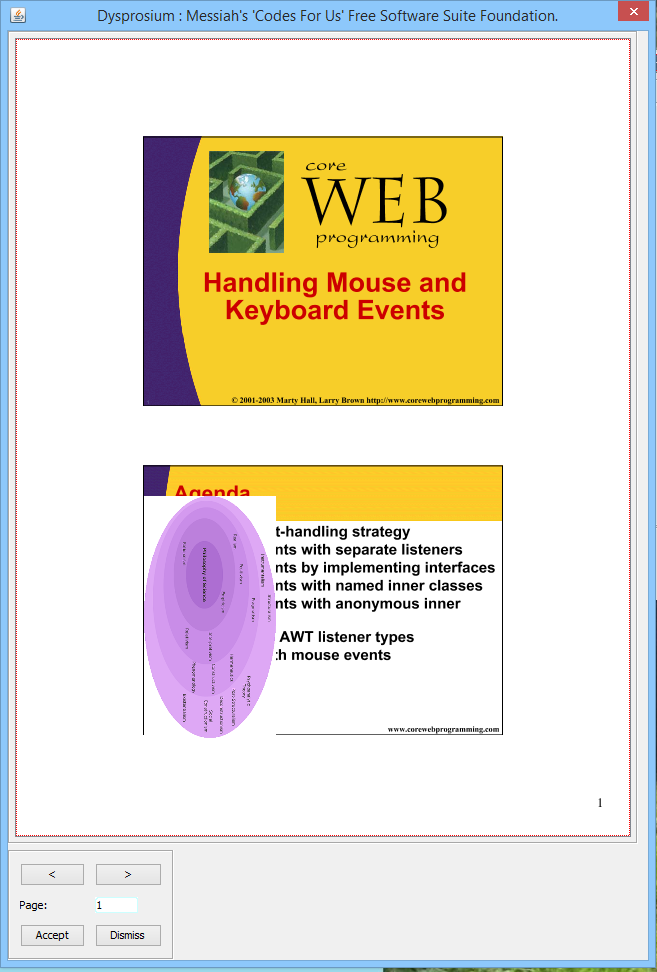
Please note that in "Preview" view the opacity of image cannot be rendered. (It is due to the fact that there is no free open source renderer available to make it possible. Work is underway to achieve this.)

If you click on "Accept" button, then your file be watermarked with desired opacity.
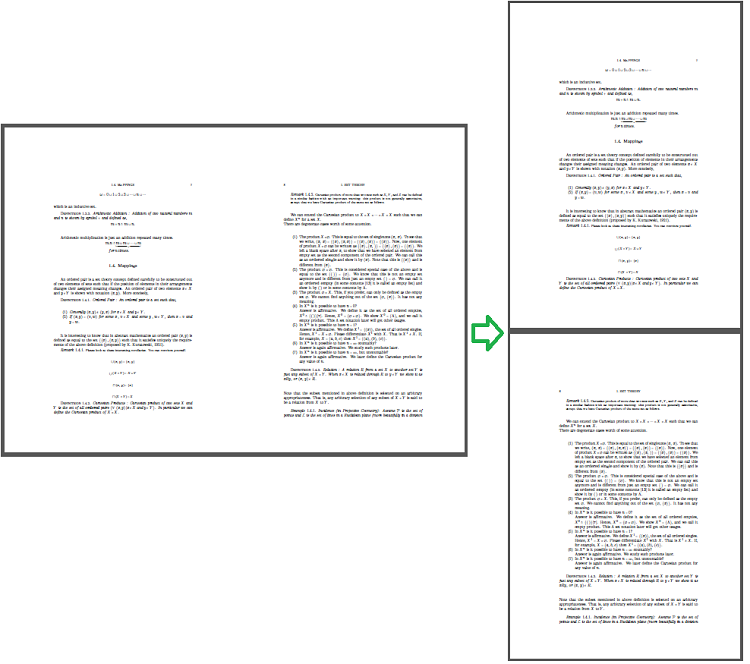
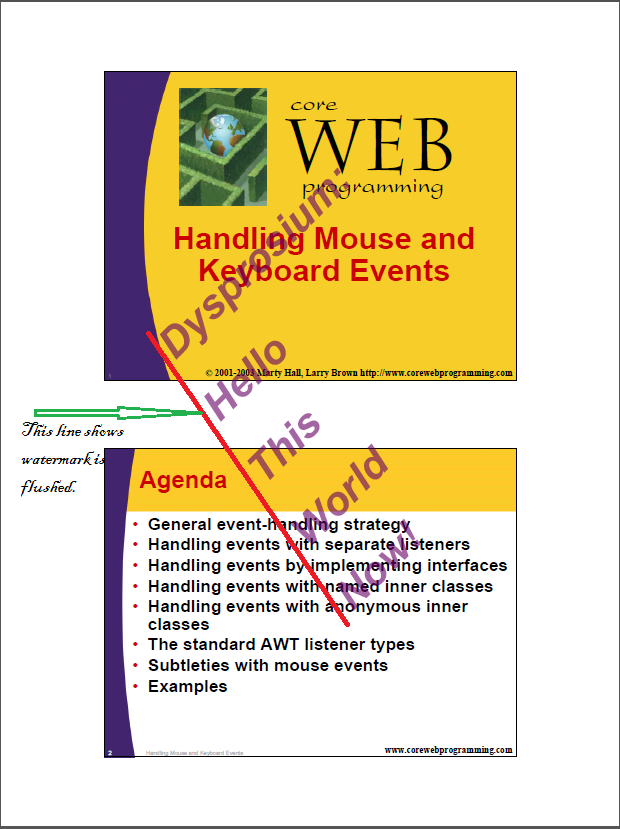
Please look at this "Fit to Width" and "For All" pages watermarked document.
- Select, drag and drop all your desired participating files in text area of the "dysfiledrop.jar" software.
- Continue to all places you like any PDF to participate.
- Then at the menu go to "File and then "Save As" to save the paths of all the participating files in a ".txt" file such as "mybatch.txt."
- Please note in the following images that files move and drop at the point where you grab them to drag. Hence, sorting of the files, later in batch merge software might become necessary. Or you need to be careful at the grabbing handle for dragging.
- If you have any text file (with extension ".txt") gathered paths of your PDF files that is not created by "dysdropfile.jar", but follows the same pattern as explained, that file also could be used straightforward. (No line-wrap, no space at the end of each line, no blank line, no carriage return line feed after the last line.)
- Also "dysdropfile.jar" can list any type of file and folders. Care should be maintained not to select and grab non-PDF files.
- You can use, therefore, the "dysfiledrop.jar" independently for any listing of files and folders on your computer for back up purposes or indexing, or play-lists and such.
- Please go to Dysprosium Batch Merge software (here) "Scenario Seven" for further information on "dysdropfile.jar" and its usage.
Please read the following "How To" to learn more about it.
- How to use Dysprosium File Listing Tool (needed for Water-mark Image Batch and for the Get Batch).
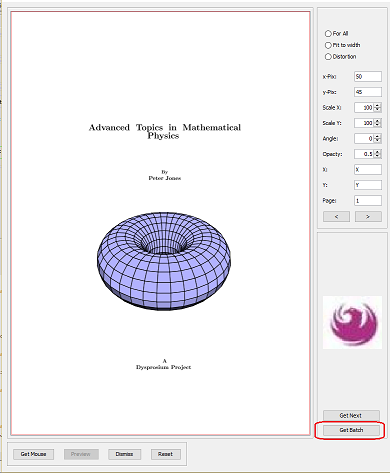
Now click on the "Get Batch" button. Brows to place that you have saved your "mybatch.txt" file and select and open it. The first image appears in place of "Phoenix" image. Make adjustment on this such as opacity, angle and scale.
All these adjustments will equally be applied to all the batch. You cannot customise each image separately when you are using a batch file for water-marks; if you want separate configuration, you need to use "Get Next" feature from the beginning.

If you click on "One Over One" radio button, then you need to brows for the second file by clicking on "Get Second" button. Second pdf file will come as background water mark to the first and will be save by your already chosen "Save As" name or by default automatic name of software.
Click on "Do It!" button to finish the Job.
As usual you can adjust parameters of watermark such as scale, fit to width, opacity (default is 0.50) and angle, beforehand.
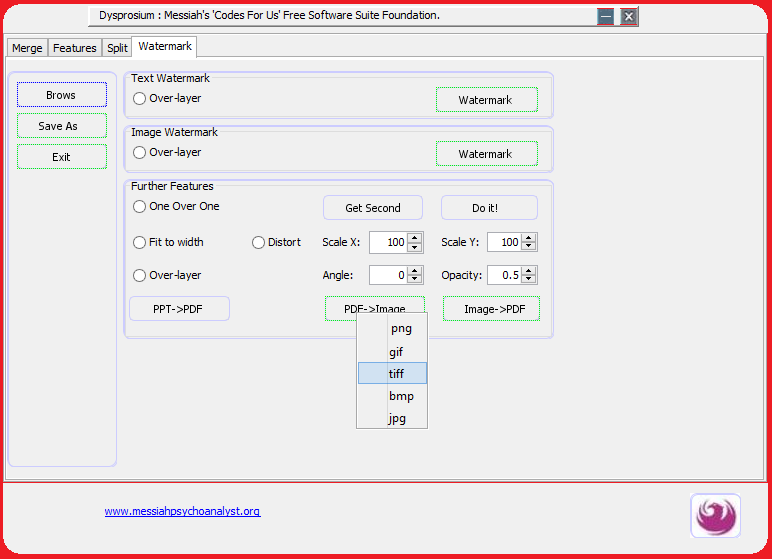
To use "PDF->Image" button please "right" click on it. Select any file format. Jpeg format will not be rendered satisfactorily due to standards for compressed files. But other formats, GIF and PNG has no such limitation. Please test for your requirements.
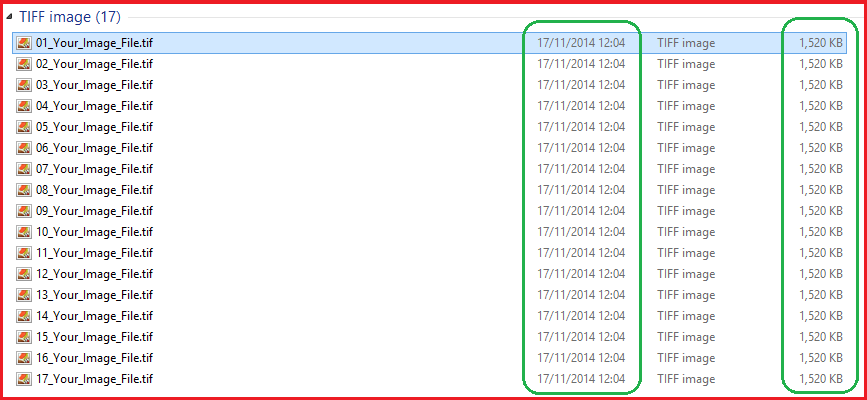
Result of a seventeen-page PDF can be seen. Images go to the directory of "Save As" or the default directory of original file.
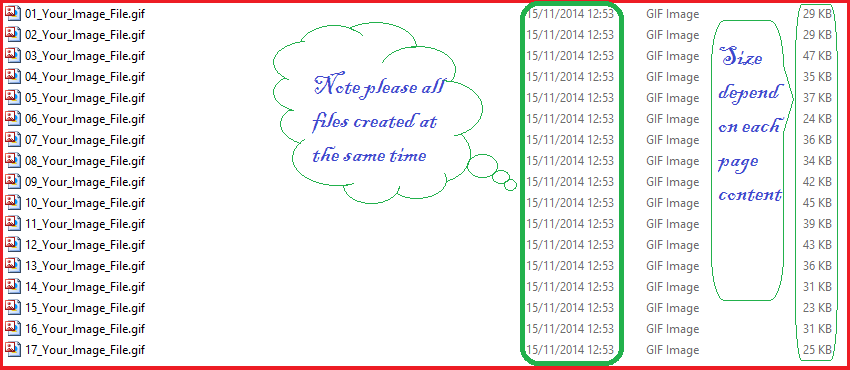
Please have a look at the image of the first page.

Conversion to "tiff" and "bmp" is subject to installation of "Java Advanced Imaging" JRE on your system which is not recommended for the most users.
To convert your image to pdf, brows for any arbitrary PDF file (that file will not participate in any operation but it only activates the "Image->" button).
Adjust how your image would change to PDF, in terms of scale, opacity, angle, etc.
Right click on "Image->PDF" button to select converting a single picture or an album of pictures in a directory
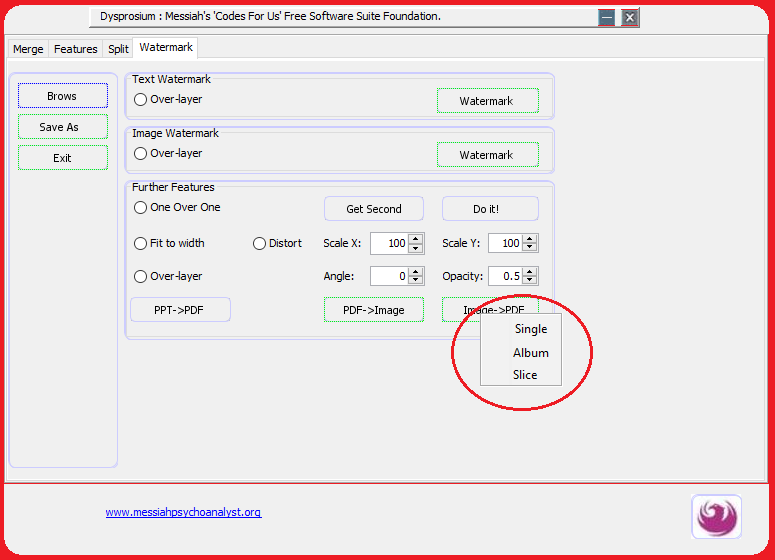
After selection it browses to your image folder. Selecting any image file for "Album" option converts all those files into the PDF files with the similar names but with ".pdf" extension.
On opening the image you do not need to do anything. For the "Single" option, the created PDF would appear in the same directory or "Save As" directory you already chose.
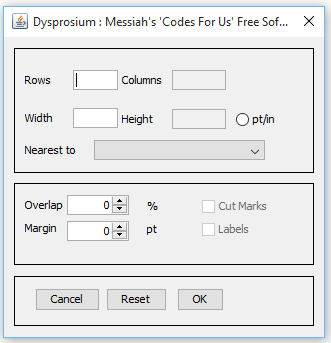
"Slice" option opens the slicing dialogue where you can decide how you like a large image to be sliced for printing, when you cut image of a poster in printable pieces with desired margin and overlap.
Result comes into one PDF file.


This page is maintained by Peter Jones, a Welsh mariner
No table is used in layout of this page; only Div tags.
First created
Last quality revision (of Web page by W3C Validator)
Optimised for ![]()
![]()
![]()
![]()
![]() HTML5, CSS3
HTML5, CSS3
Last updated
Number of downloads at this date

10:20 01/06/2010
18:40 21/11/2013
18:35 21/11/2013
10:05 23/08/2016
exceeds 60,000

